Ikea Stoarage Bed build process
Welcome to my custom storage bed. I’ll be sharing a bit about how I designed and built this bed. If you wish to learn more about the video process, click here.
I built this bed during my move to a new house closer to my work location (two hours closer, thank goodness). It was inspired by a popular YouTube video by HandyDadTV found here.
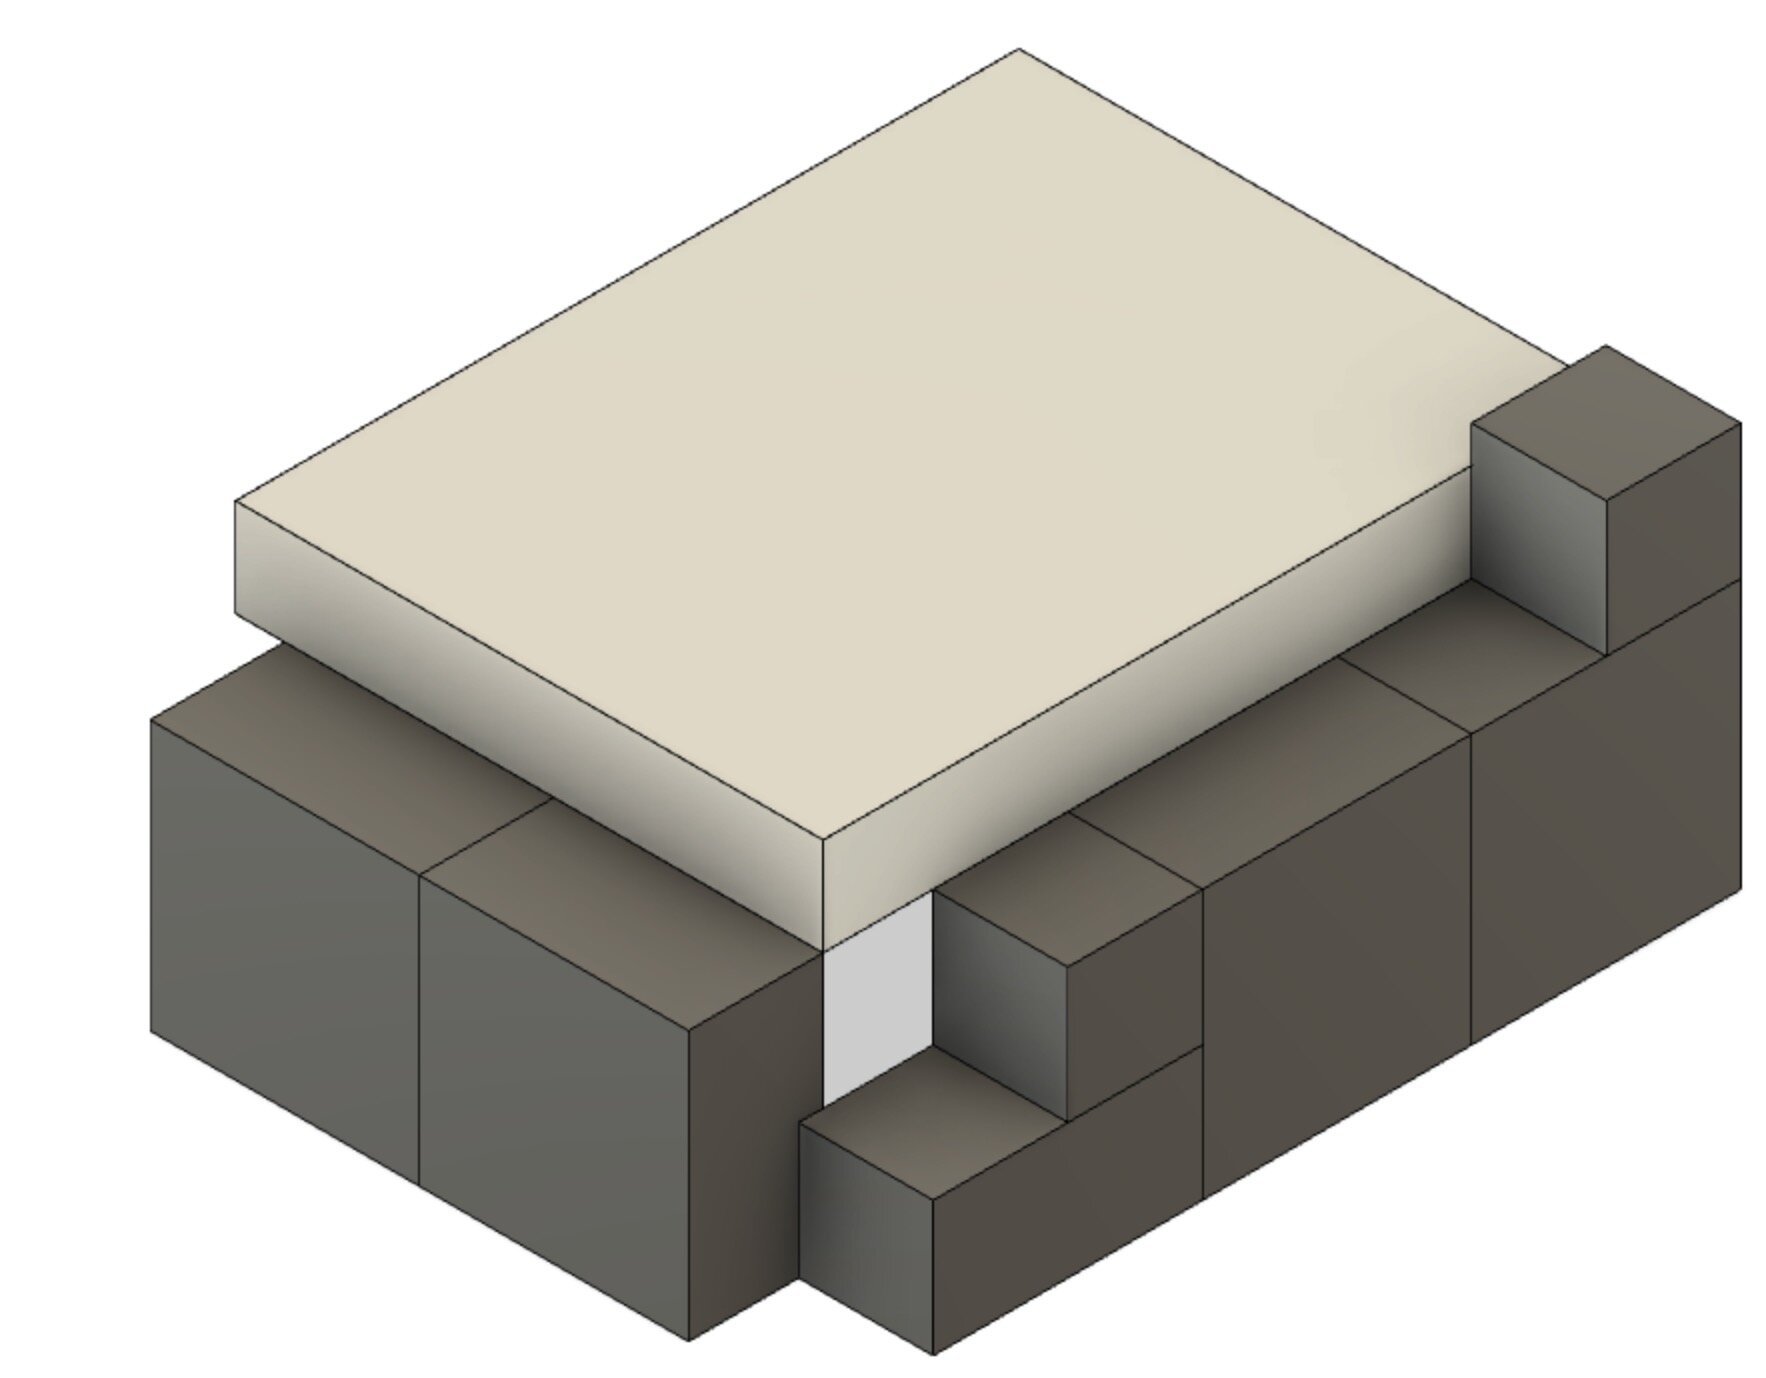
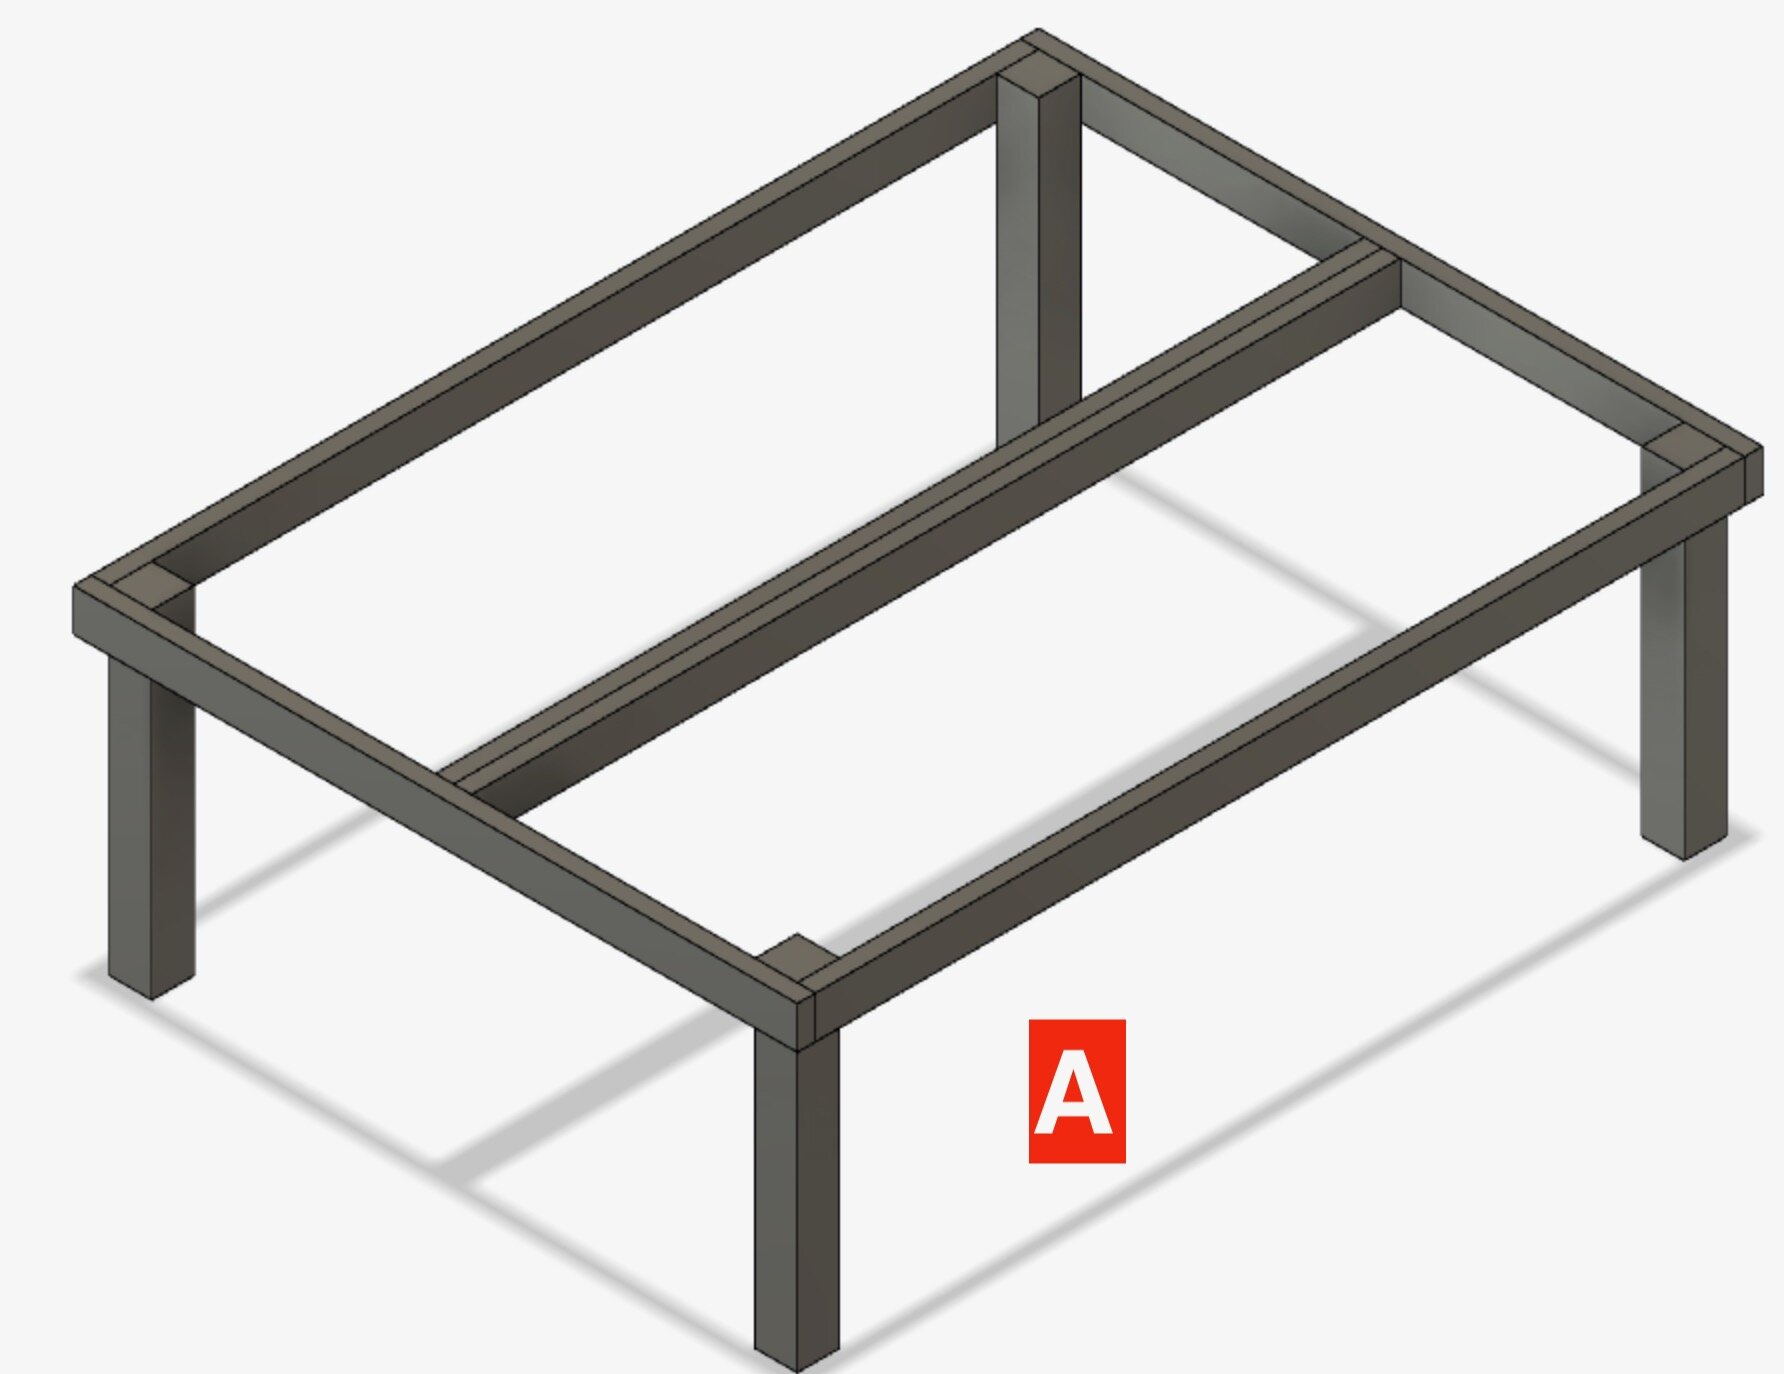
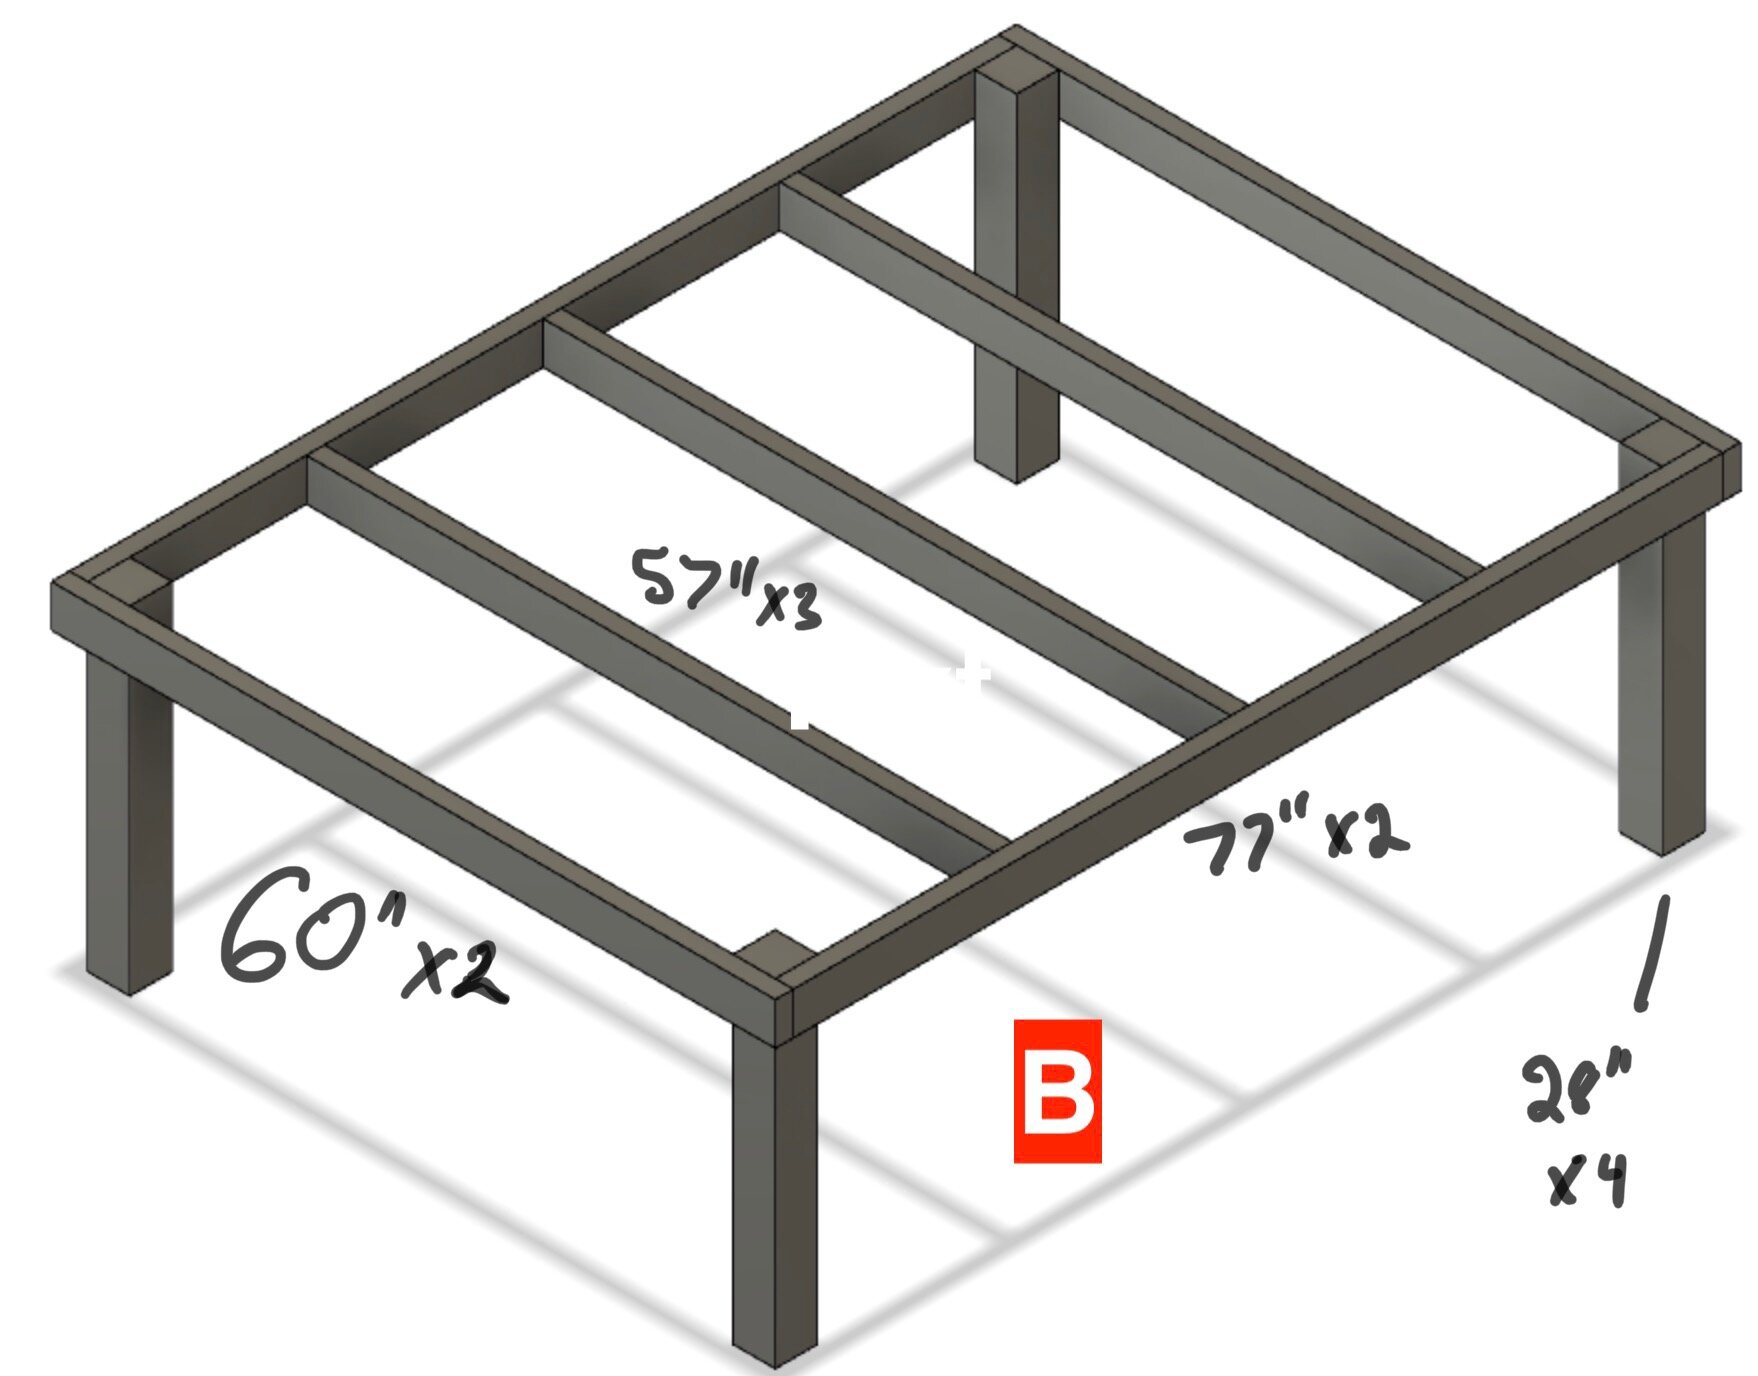
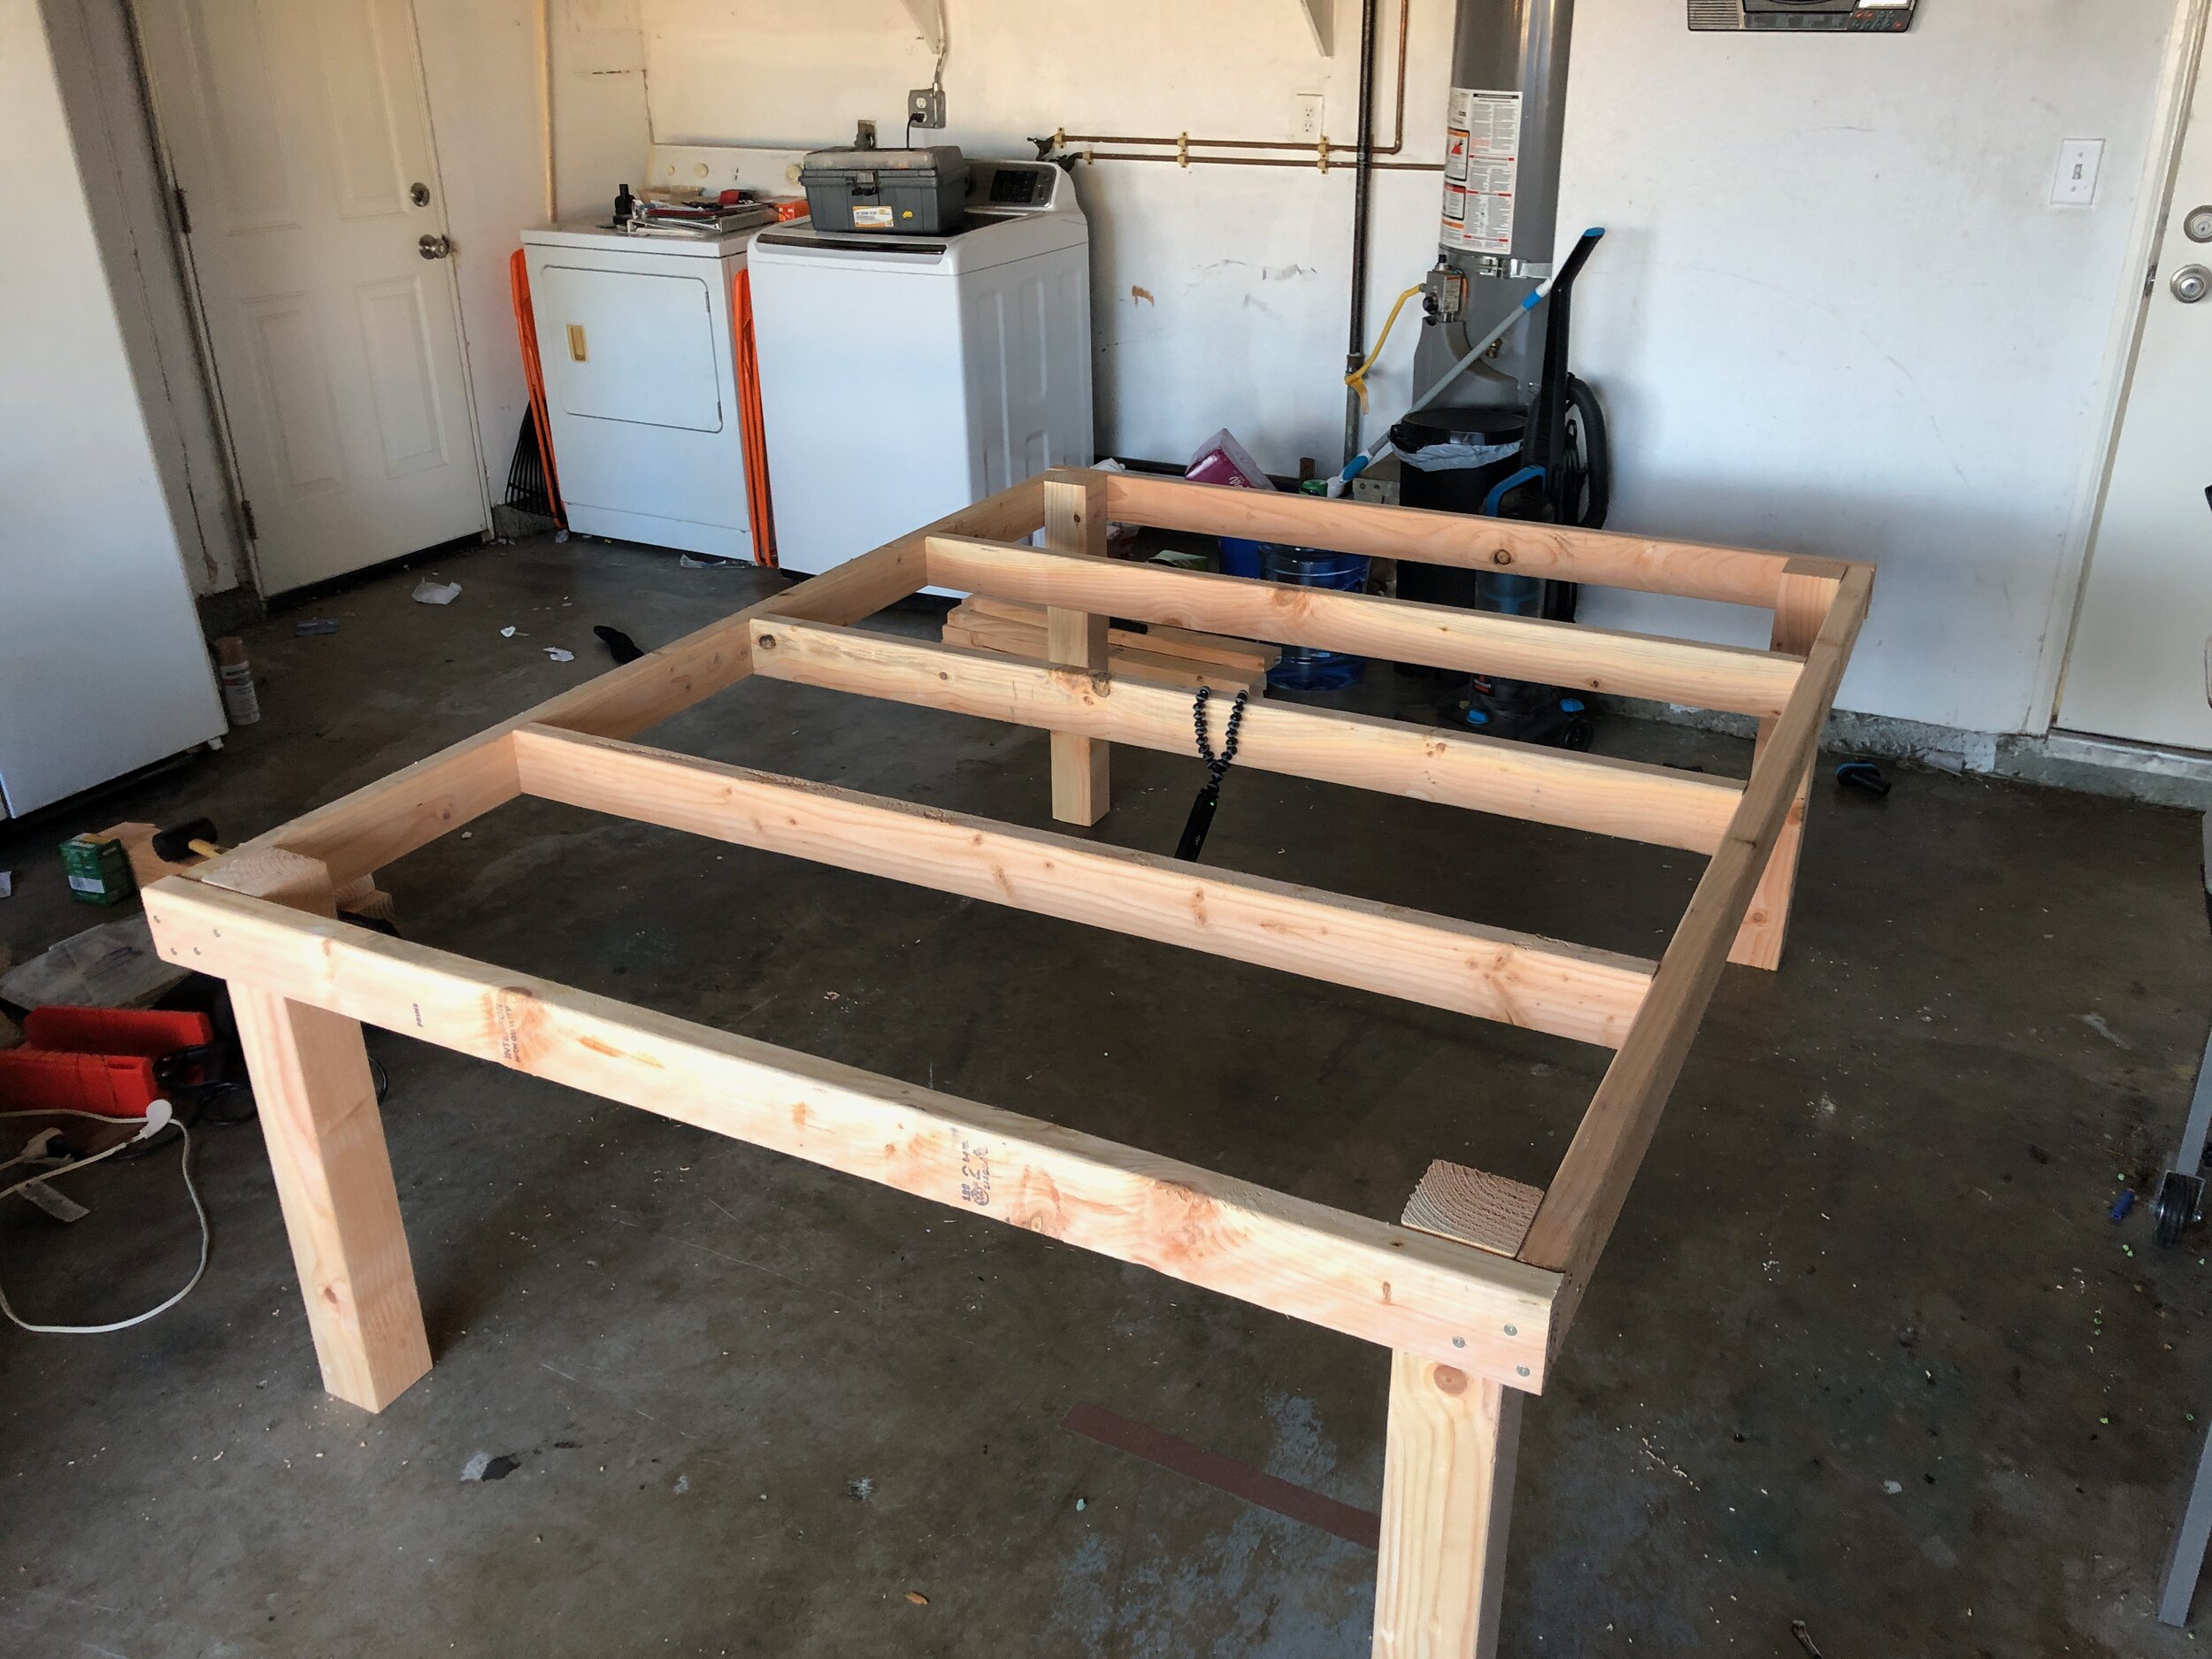
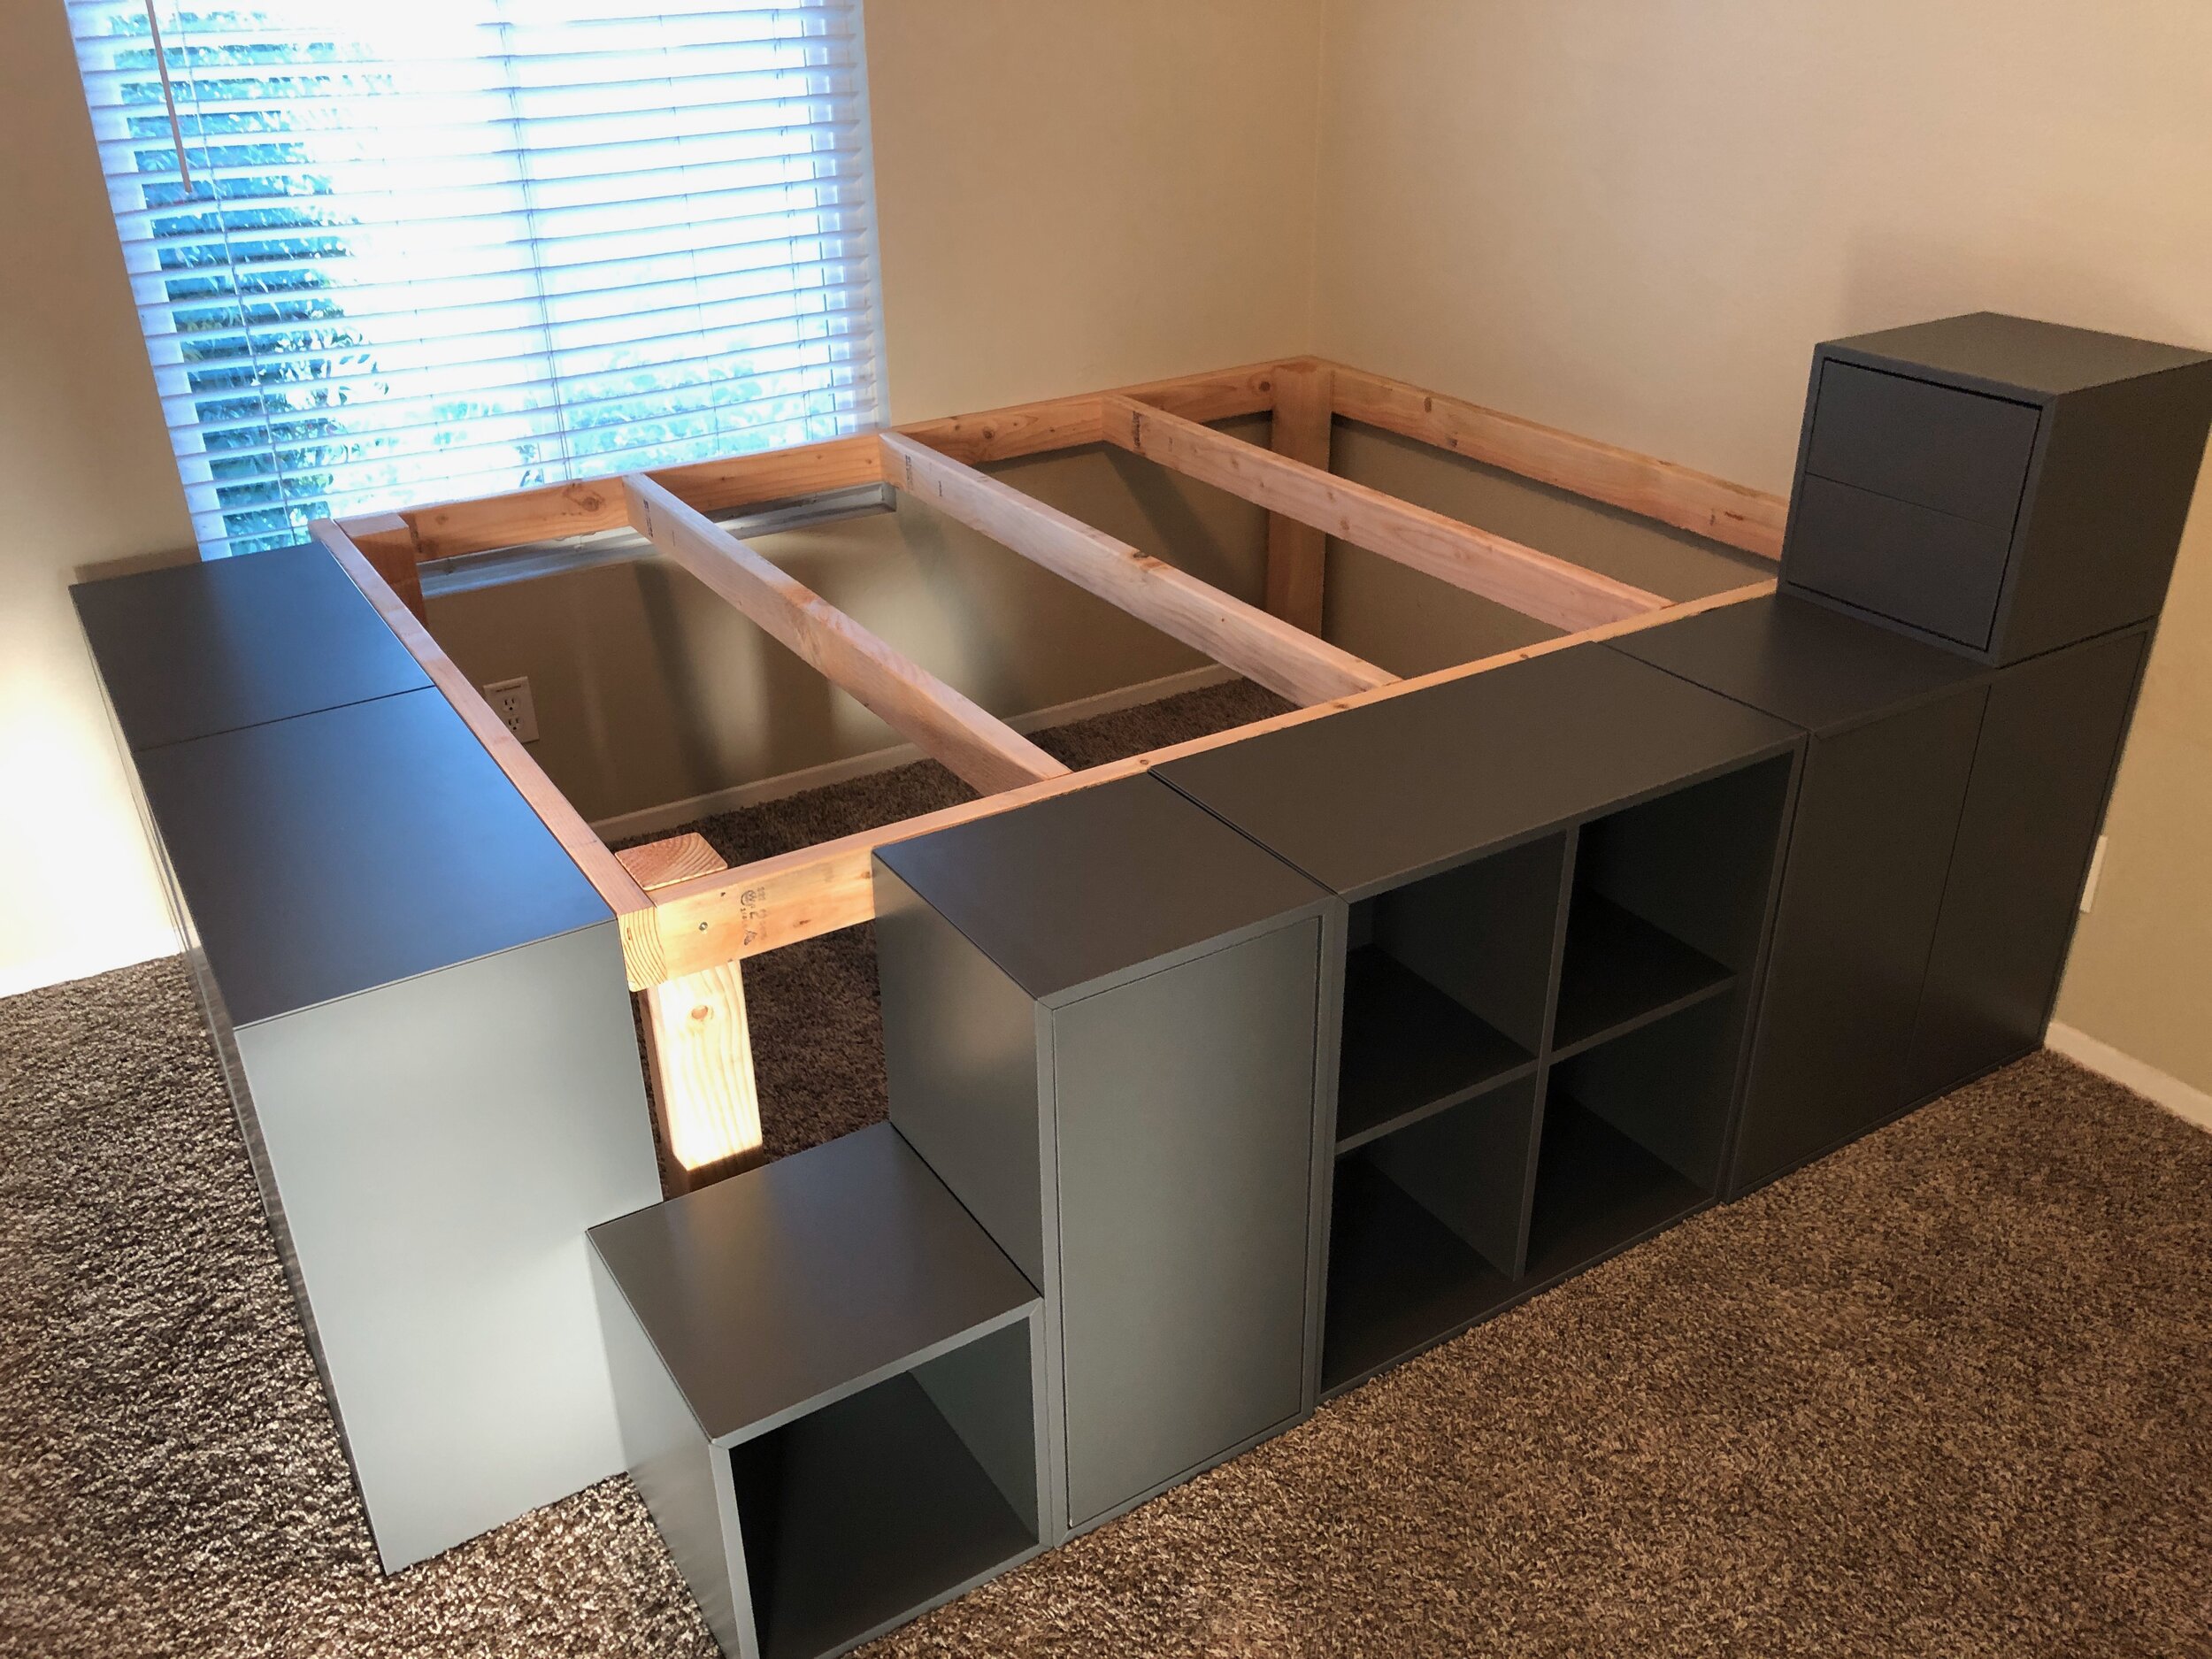
I started with a 3D mockup (pictured) of what I wanted which was an immense help during the entire build. If you don’t start with mockups on your projects, I strongly suggest you do. Using the measurements available for the Ikea EKET series furniture, I made my mockups as close to reality as possible. This allowed me to find the exact measurements of the lumber needed for the frame of the bed.
I purchased the lumber, hardware, and light strips from Home Depot. So far, the frame has been incredibly solid, especially after attaching everything.. to everything (EKET furniture all screwed together, then all also attached to the frame). I also got a new mattress to help with a recent back injury i’ve sustained. The new mattress has a control unit and air hoses that I also had to route through the underside of the frame with some custom 3D printed brackets.
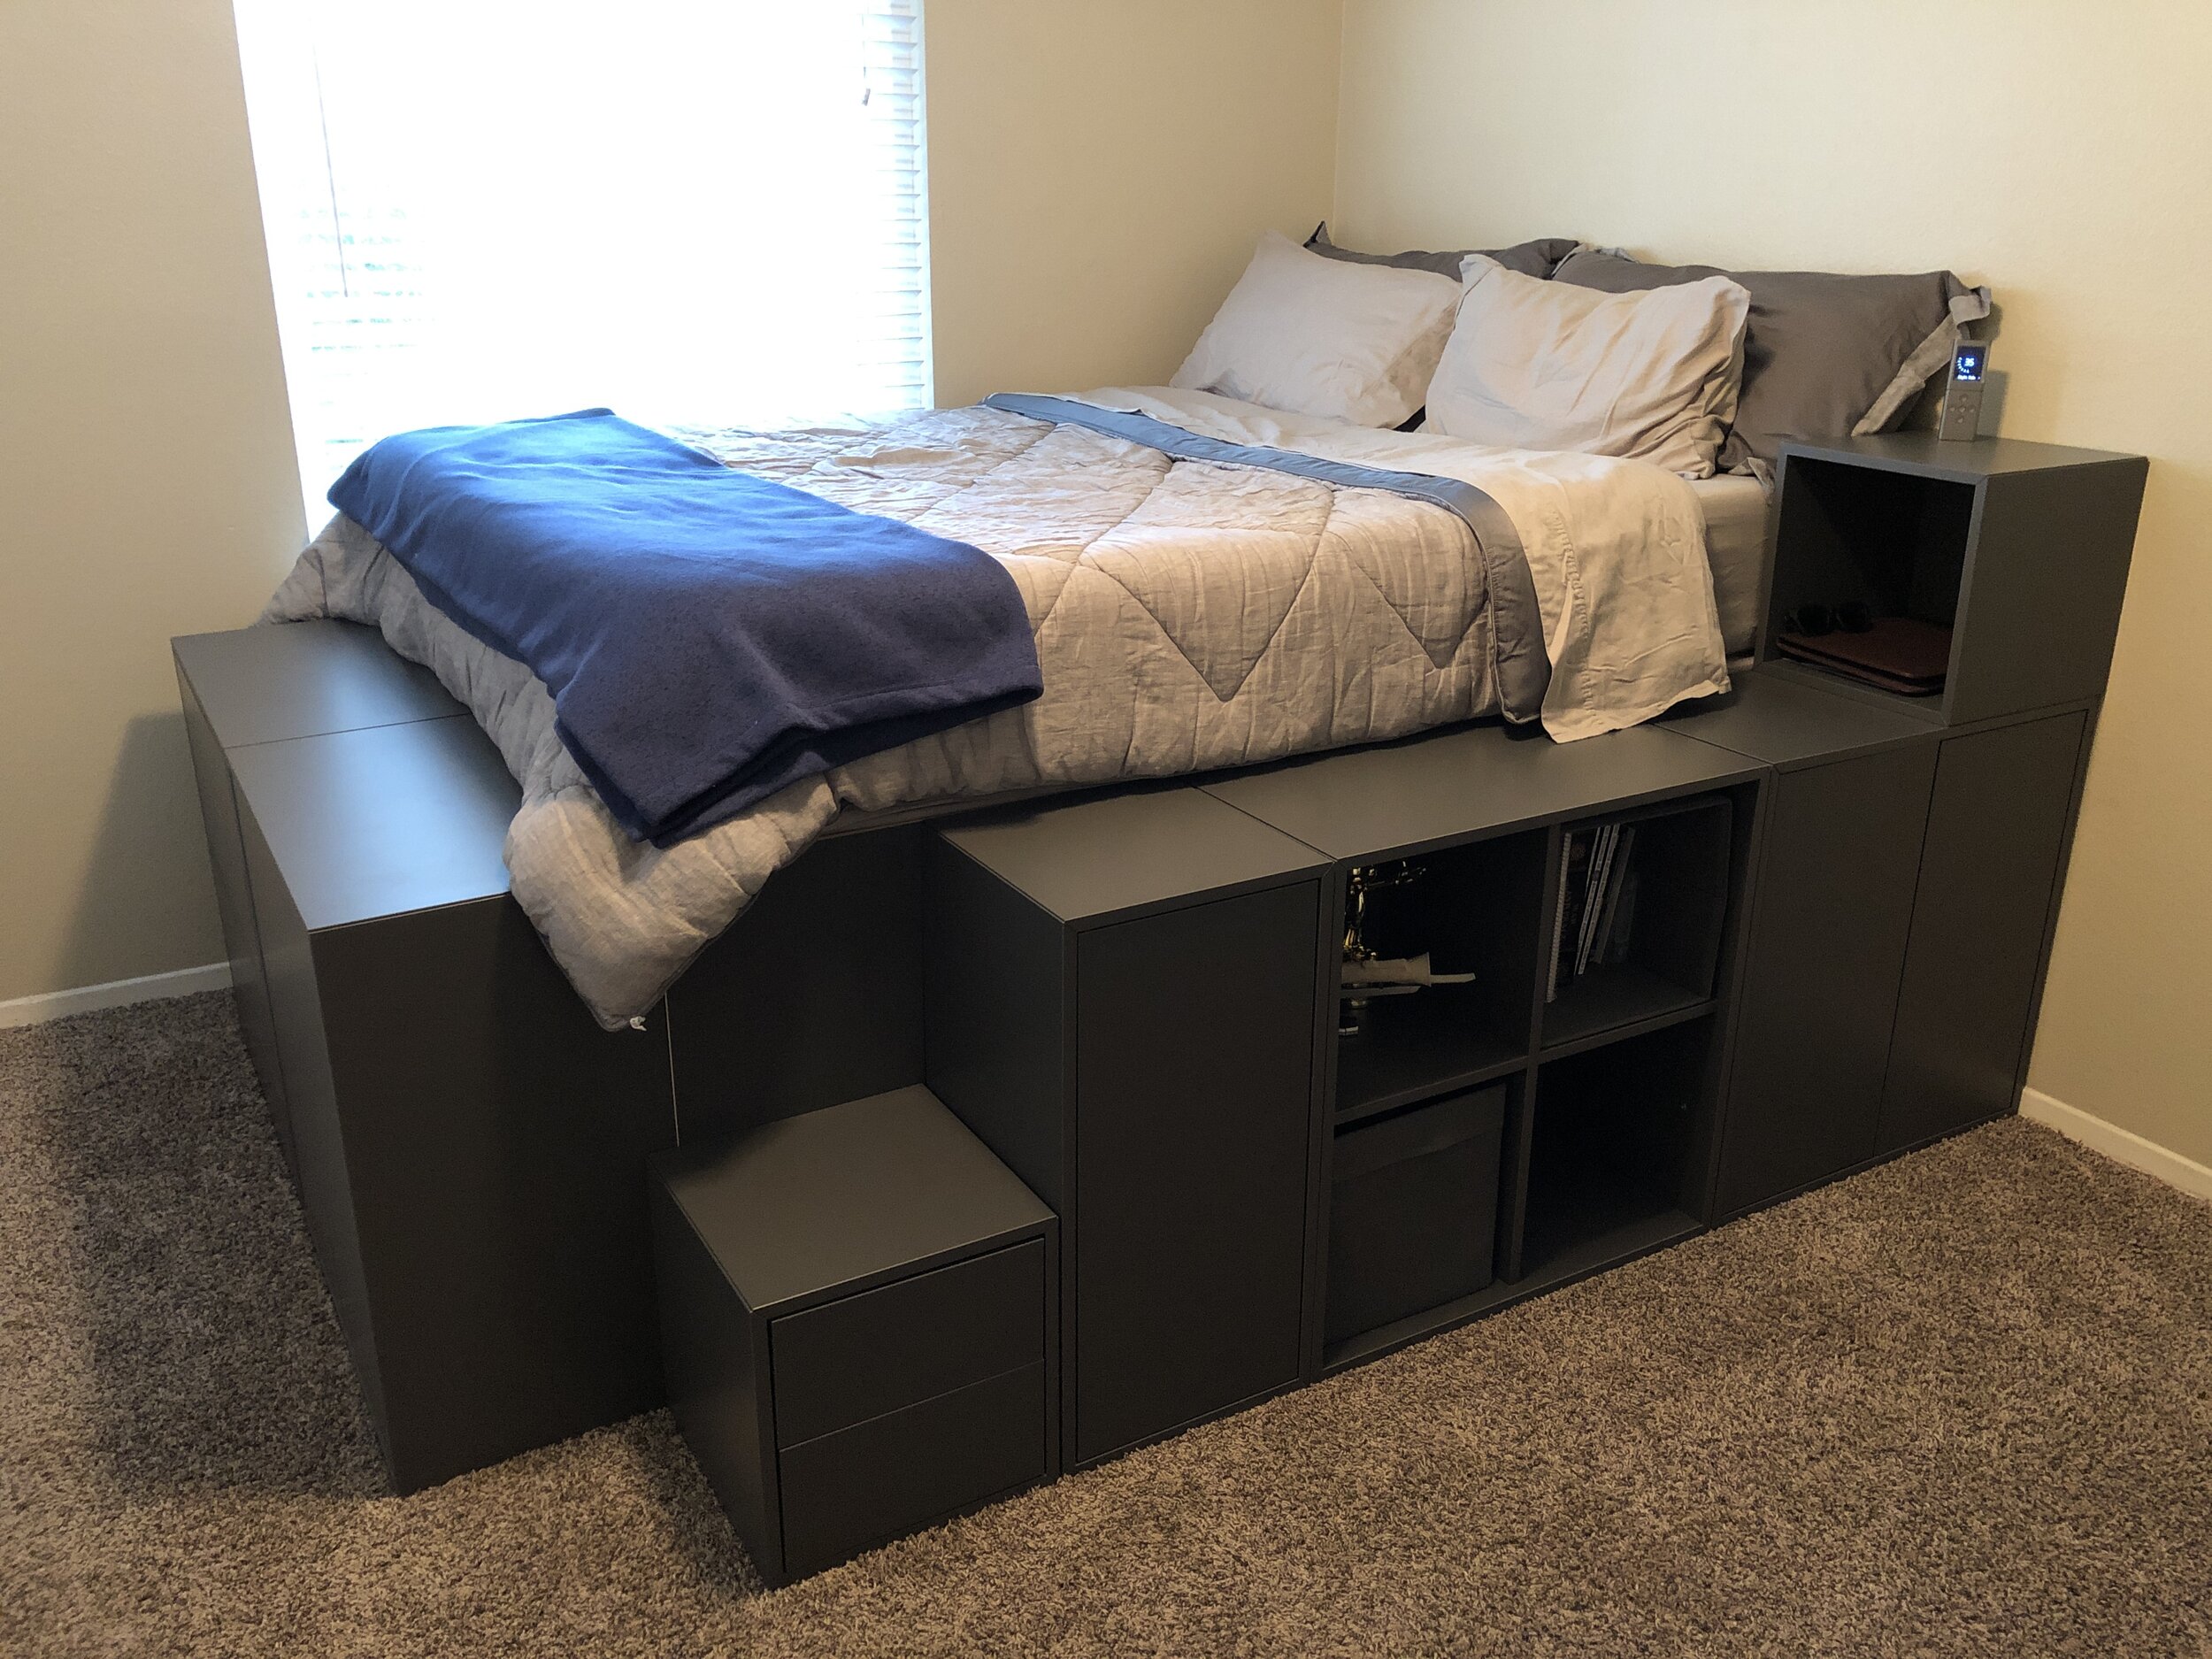
The nightstand block was fitted with a few 3D printed brackets and boxes that house device charging cables, device remotes, and cables for an Amazon Echo. Cable management was very important to me and I knew I would need to make something custom for my necessities. Using some leftover backing panels that were unused from the EKET furniture, I created a small box in the top left back corner that hides perfectly and matches the color exactly.
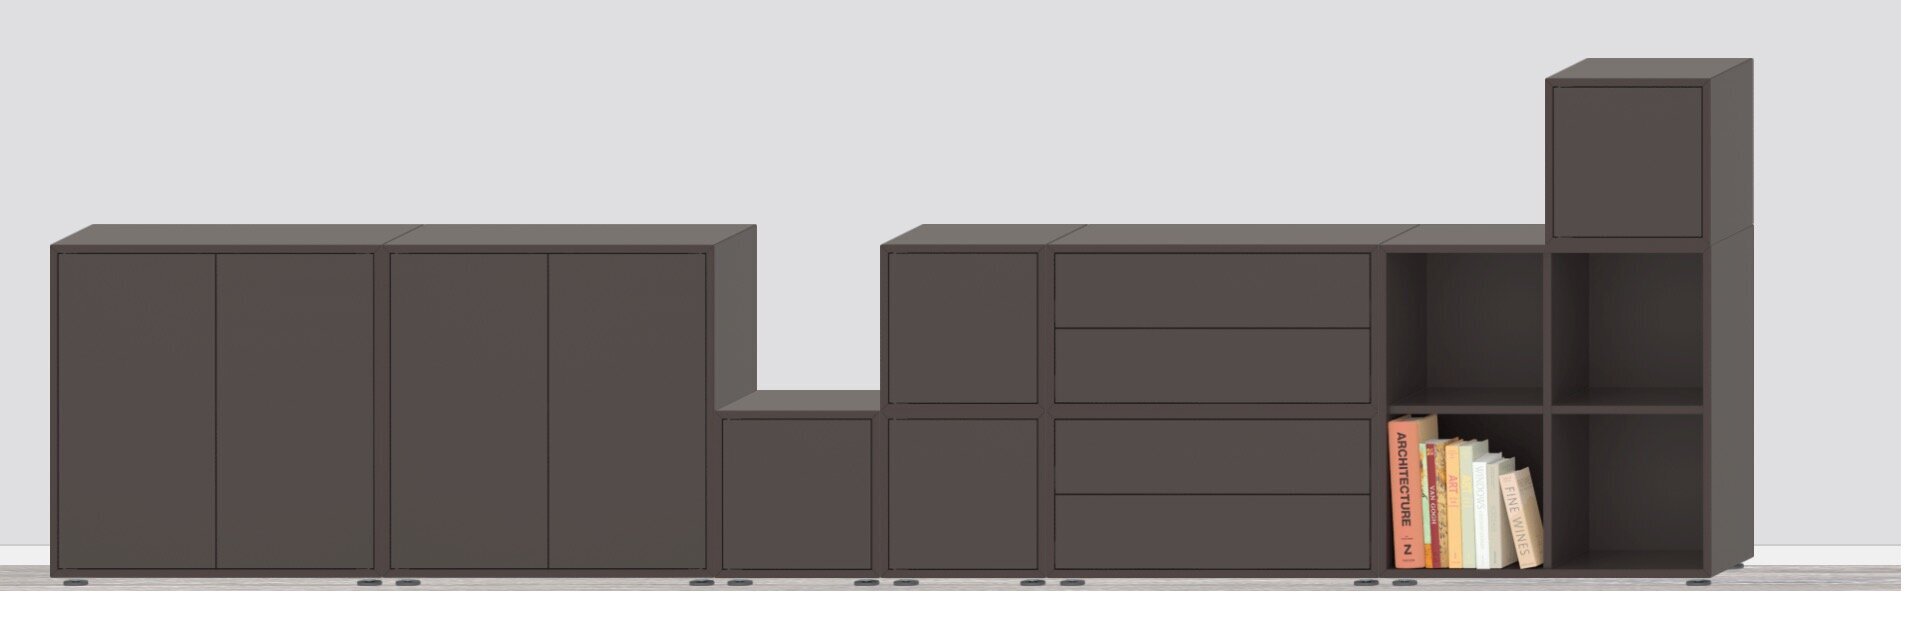
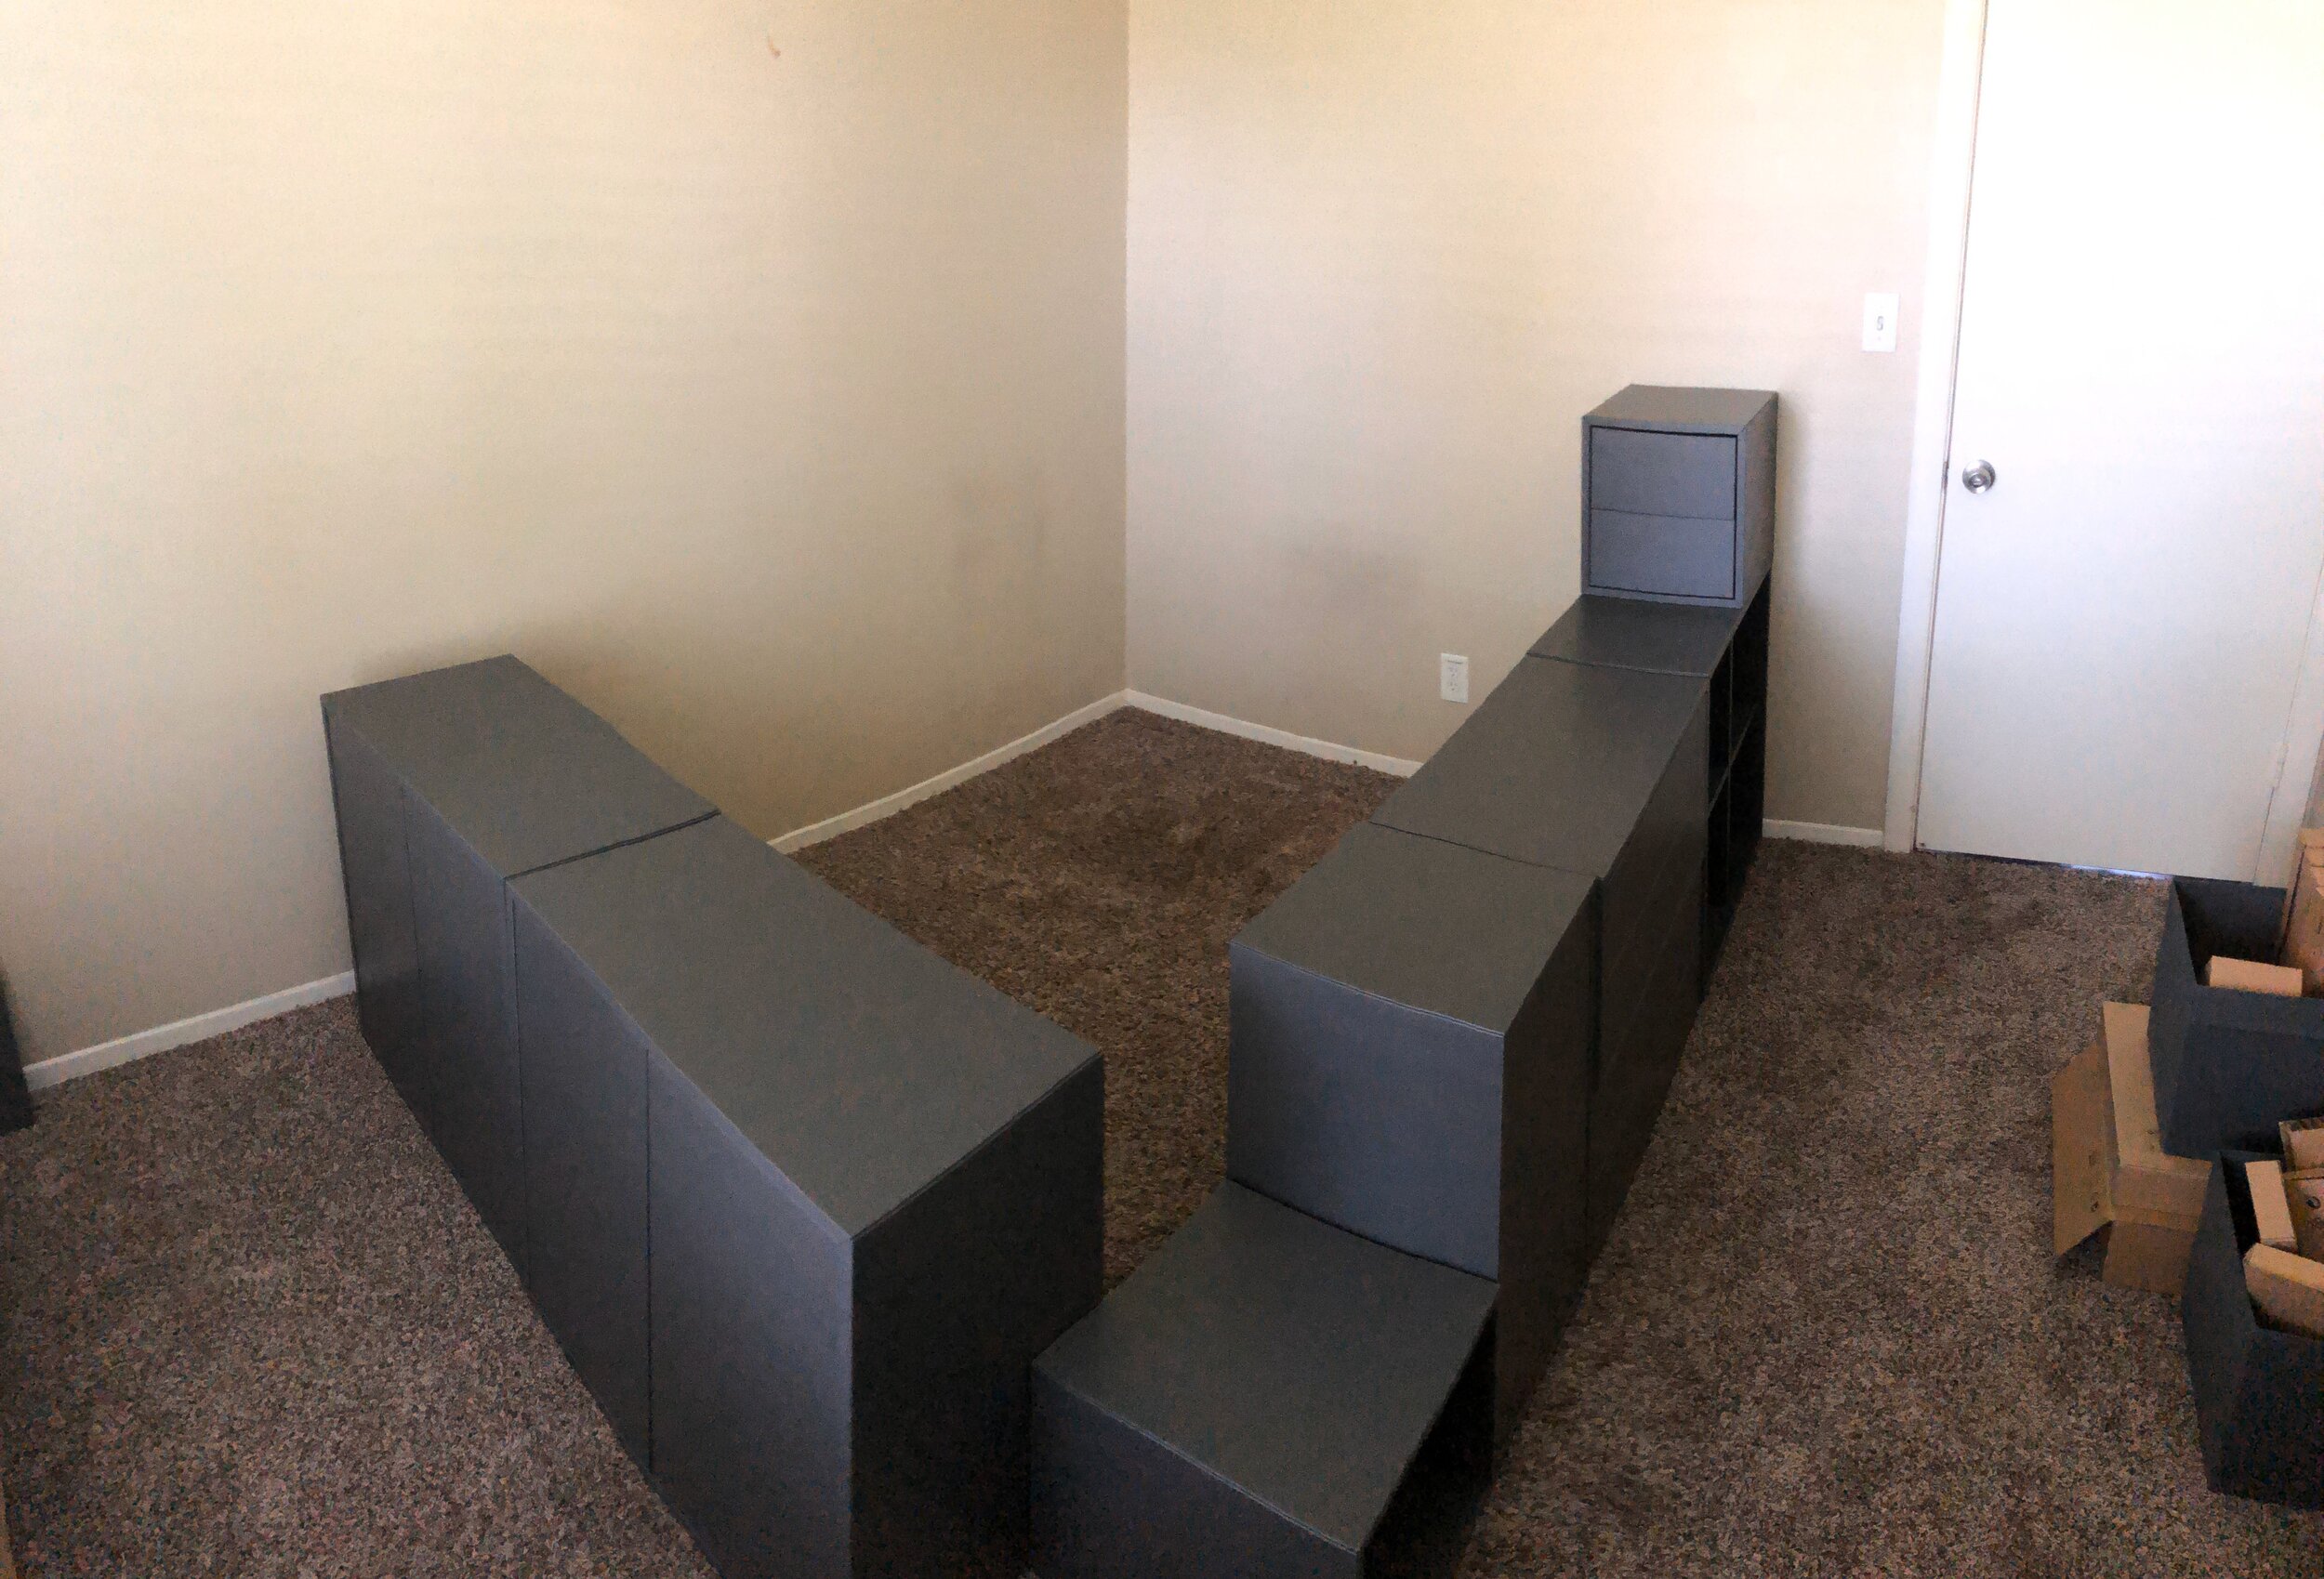
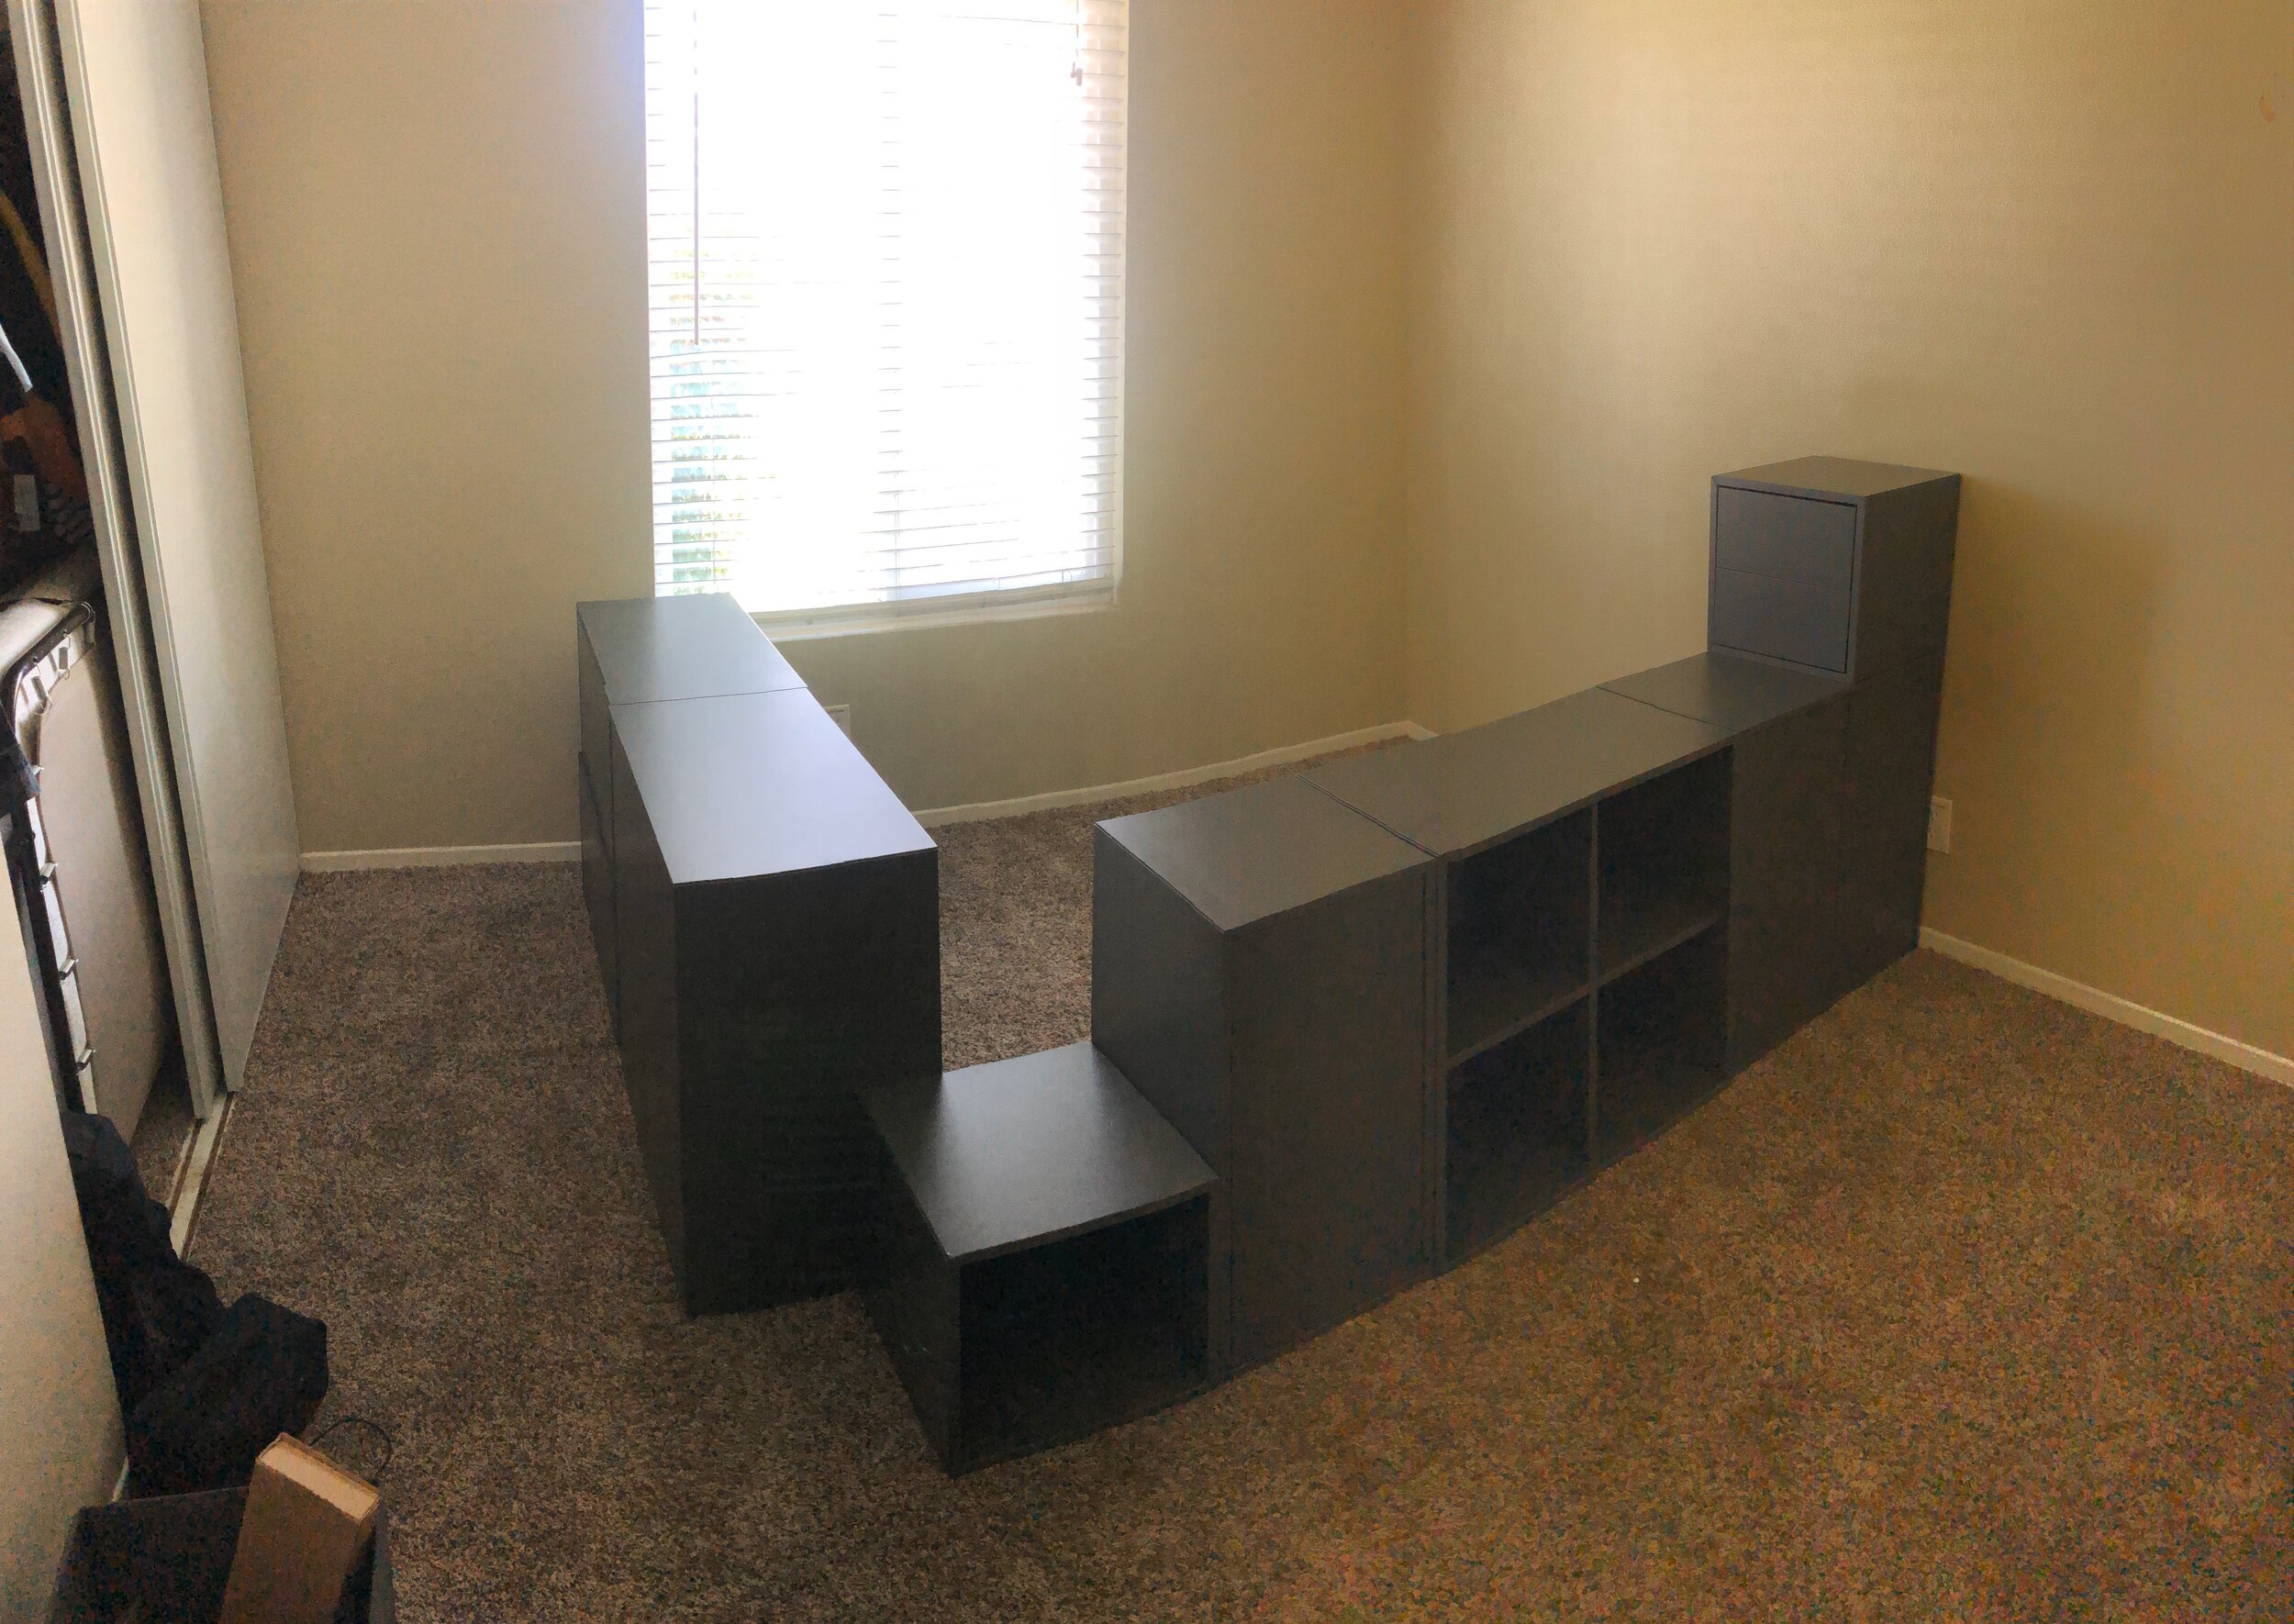
The great part about this design is it allows for storage along the entire footprint in my room. The perimeter is all shelving units which come in a wide variety of combinations to fit your needs and double as a small step to get into the bed. The underside of the mattress, serves as a long term or large volume storage. For someone like me who saves a lot of interesting materials (lots of cardboard boxes too), this is a blessing. I would never be able to store the amount of things I have comfortably in the same room without the double function of a bed with a lot of storage space.
To conclude, this project was a lot of fun. I have wanted to build this for quite a while and the opportunity of moving presented it nicely to me. I am very happy with the result and fully trust it will stand the test of time. If anyone should have any questions into the process, techniques, or 3D models used, feel free to contact me through this Contact Form. Enjoy
.-Zach